Restaurant Billing System Project using Java & MySQL
The "Restaurant Billing System" is a desktop-based Java project and has been deployed to override the problems prevailing in the practicing manual system. This software is supported to eliminate and in some cases reduce the hardships faced by the existing system.
The Project is developed using JAVA SWING & MYSQL.
The project basically has only one module:
1) ADMIN MODULE
Let's see the project in detail.
- Initially, when we run the project application will ask us to sign up. And we will able to see the below interface.
- And here each field is validated. That means we can't leave the fields blank. So, after entering the proper details, when we click on the Register button, the user will be registered as Admin and we'll get a message on the screen as Registered Successfully as its details will get added to the database, and we'll be redirected to Logi Page, as we can see in below screenshot.
MYSQL WORKBENCH
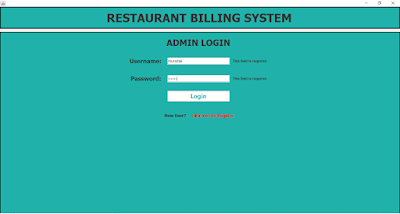
LOGIN PAGE
- Here, the Login page is also validated, in fact, each page present in the project is validated. If we try to log in by using the wrong incorrect credentials then it will not log in to us. So after entering the correct credentials when we click on the Login button, it will show us the message on the screen LOGIN SUCCESSFULLY AS MURADALI and it'll redirect us to HOME PAGE.
- Here we are already able to see the available Food in the restaurant because I've already added that food as Admin.
At the top, we can clearly see that we can search the food based on Food Name, Food Category & Food Price.
- Firstly let's try to search by food name, so let's search 'za' from pizza
- After that, we can also search for food by using the food category, so let's search for food by using the category Light Food.
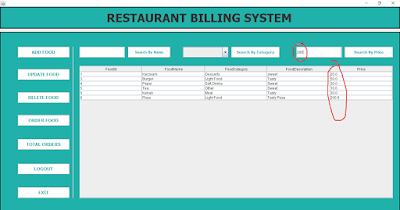
- In a similar manner, we can search for food by using food prices. When we'll search for food for a price of 200, we'll able be able to see all the food which is off or under 200.
- After searching, the admin can ADD the food. So, when we click on add food button it will redirect us to Add Food page.
- Now, after entering the proper details of food when the admin clicks on Add food button, then it will show the message on the screen as Food Added Successfully and Food will get added to the database.
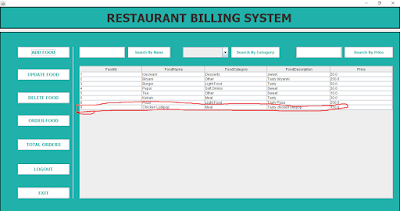
- Now when we get back to Home Page we'll be able to see this food-added food.
- Now, Let's Update the price of Chicken Lollipop to 250 from 150. So, for that, we'll click on the Update Food button and now it will redirect us to the update food page.
- So, for updating the food Chicken Lollipop first we have to enter its food id i.e. 9 and after that when we click on the Get Food button it will print all the details of the chicken lollipop. And, now we can update the details of it. So, as of now let's change the price from 150 to 250, and now when we click on the Update Food button it will show us the message on the screen as Food Updated Successfully, and Food will get updated into the database.
- Now, Let's delete the food Chicken Lollipop. So, for that, we'll click on the Delete Food button and now it will redirect us to the delete food page.
- So, for deleting the food Chicken Lollipop first we have to enter its food id i.e. 9 and after that when we click on the Get Food button it will print all the details of the chicken lollipop. And, now we can delete food. So, when we click on the Delete Food button it will show us the message on the screen as Food Deleted Successfully, and Food will get deleted from the database.
- And now, ADMIN can take the food ordered by customers in Restaurants and can make the BILLS for the Customers.
SO NOW LET'S MAKE THE BILL
- So for making a bill click on Order Food, so it will redirect us to Billing Page as shown below.
- In the above screenshot, we can see that for making an order, the admin has to enter the customer's name, his mobile number, and the total Food he has ordered with the quantity.
- And at the left side, we can see that we have the search option like we can search Food by using its name.
- So let's make the bill for the customer name Murad Ali.
- In the above screenshot, we can see Murad has ordered Biryani with quantity 1. Now, when we click on Add Food button it will add that food to the below list as we can in the below Screenshot.
- In a similar manner let's add more foods to the list.
- Now, when we click on ADD button, the order will get into the database and we'll be able to see the message on the screen like Ordered Successful and Bill is generated, our Bill will generate on the right side.
- Now, after the generation of the bill, when we click on the PRINT button, our bill will get saved in the admin's system in PDF format and the Customer will get the total bill in his mobile number as shown below.
- And after that, Admin can also see the total orders to date. For that Admin can simply click on the Total Orders button from the home page. After clicking, he'll be able to see the total orders as shown below.
- After that, Admin can simply Logout from the application just by clicking on Logout Button.
Other practical projects using React & Spring Boot
1) Employee Management System using Spring Boot Microservices & React.
2) Hotel Management System using Spring Boot & React.
3) E-commerce Project using Spring Boot & React.
4) Gym Management System using Spring Boot & React.
Students can use this project for learning and can submit the project for their final year or Internship projects.
IF YOU WANT THE PROJECT DO CONTACT ME.
I will give you the full project SOURCE CODE and I will do a COMPLETE SET-UP of the project on your PC or Laptop remotely.
Or You can simply Request for the Project Source Code & Set Up by clicking on the below button.
MAIL ME AT codewithmurad@gmail.com
DM ME ON INSTAGRAM at @codewithmurad
DM ME ON FACEBOOK at @codewithmurad
DM ME ON TELEGRAM at @codewithmurad
Connect on My Discord Server: CLICK HERE


.png)
.png)

0 Comments